Carpet Installation Tips, When I had initially decided to carpet my spare bedroom I had assumed that it would be a simple weekend job. Well, it could not be that difficult to spread some padding and carpet, right? The result of that overconfidence was a few expensive mistakes and much backing up. I am a lot more skilled at it over the years and I would like to tell you what really works when you are at it by yourself, installing the carpet.
Beginning With a Bone-dry, Level Subfloor.
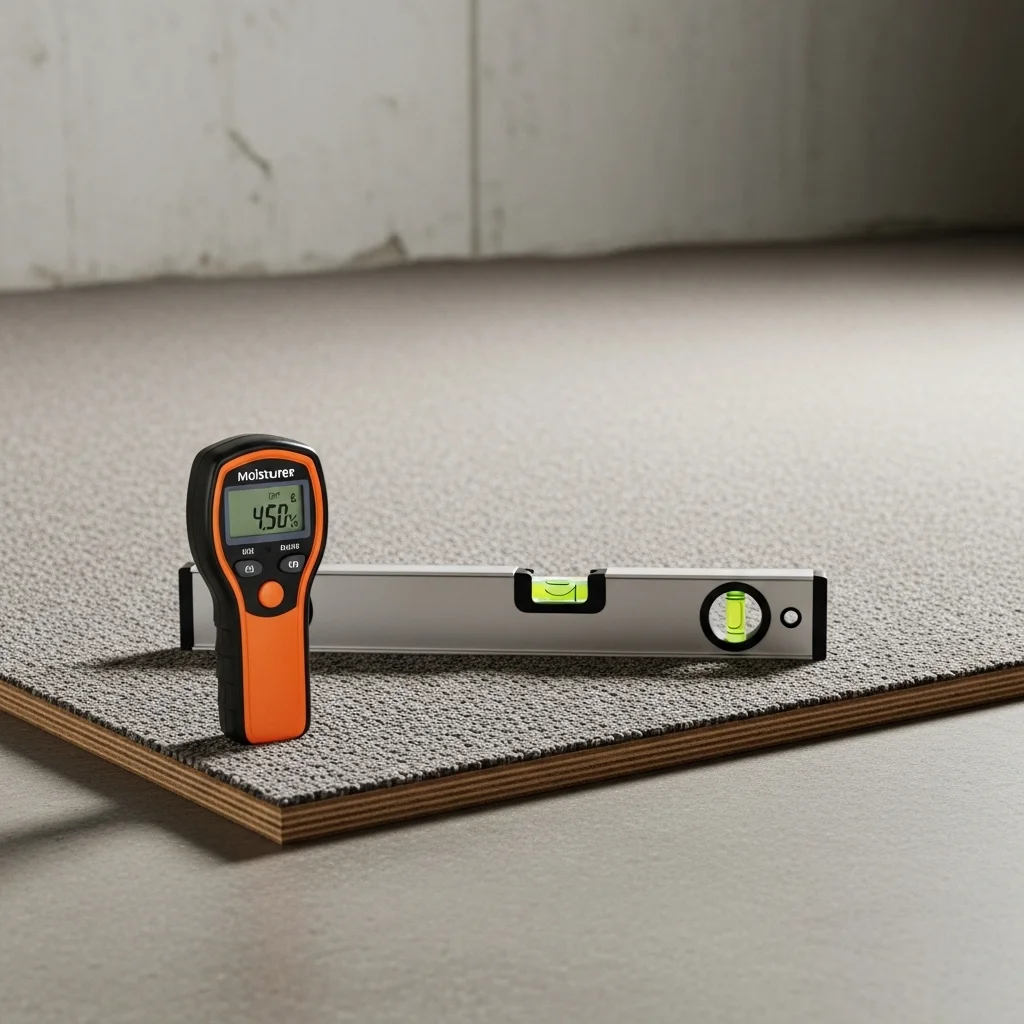
This may seem to be a given fact but it is the state of your subfloor that will either break or make your installation. I discovered this by experience when I fitted carpet on a concrete basement floor which I believed to be dry. On the third month, I observed a pungent smell. As it turned out, I had not gotten all the moisture out and as a result, the padding got mildew.
The first thing you should do is to check moisture levels using a moisture meter (you may hire one in most hardware stores). In the case of concrete, more than 4.5 percent moisture content is excessive. In the case of wood subfloors, above 12% is to be sought. In addition, check dips and bumps with a six foot level. Any deviation more than one out of sixteen inches within a ten-footed distance must be taken up with leveling compound or ply-wooding.
Should not Skimp on Quality Padding.
This is where many DIYers, I used to be one of them, make an effort to save money. You may think that cheap padding is a good area to save money on, however, it is not one of the best areas to save. I once purchased padding on the bargain-bin section of a living room purchase and I figured that instead I would spend a lot more on better carpet. After a year, the carpet began to form wearing patterns and was no longer as comfortable to stand on.
Quality padding can increase the life of the carpet, increase comfort and even offer better insulation and damping of sound. In high traffic zones, I would suggest 7/16-inch rebond padding with 6-pounds density. On bedrooms, a slight bit tamer 8-pound density memory foam padding will suffice. The additional amount of 50-100 money will extend the life of your carpet by several months.
Proper Measuring Eliminates Costly Failures.
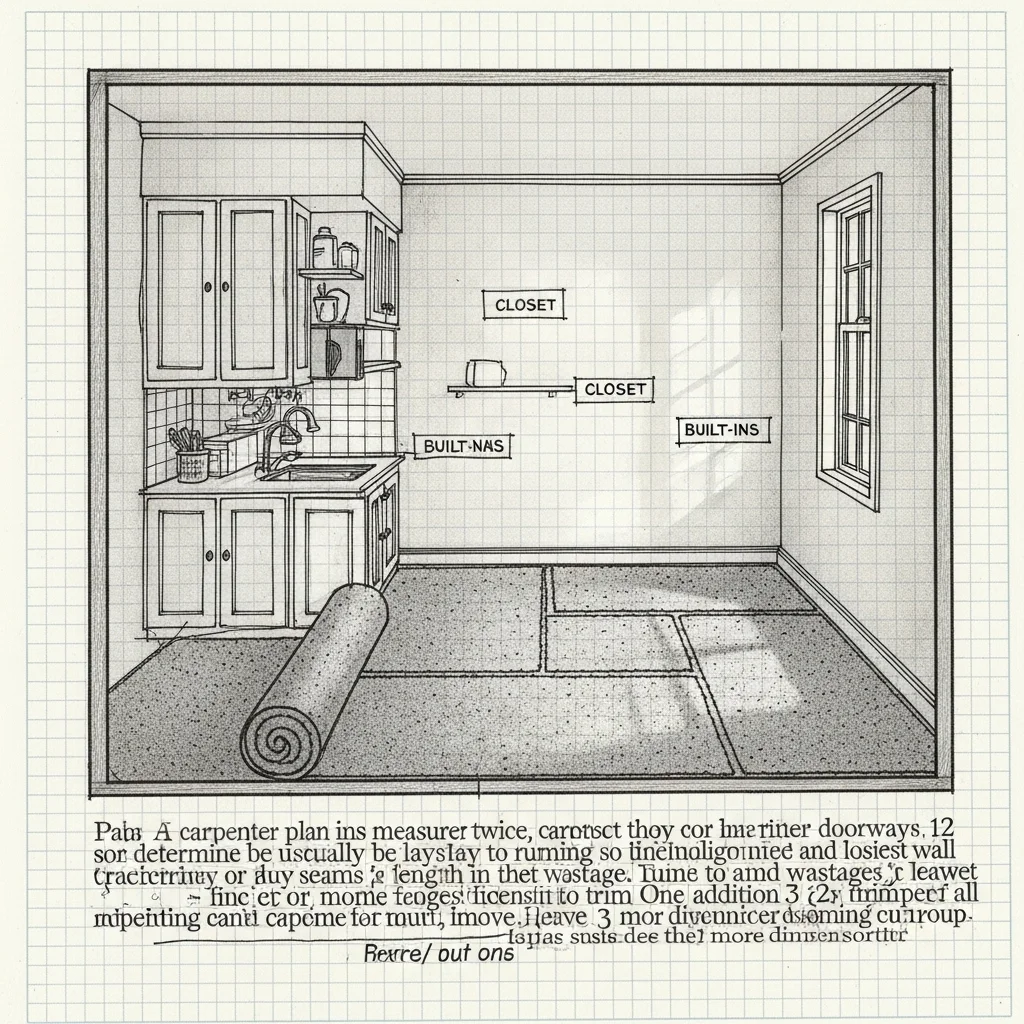
The carpenter saying goes: measure twice, cut once applies to carpets installation at least 10 times. Carpet is available in certain lengths (typically 12 or 15 feet), unlike hardwood or tile, and one, who is inaccurate, will end up with unsightly seams in the high-traffic zones or will need to purchase extra.
I sketch a drawn-up plan of the room on graph paper, identifying doorways, closets, and built-ins. Subsequently, I determine the way to lay out the carpet so that seams and wastages are limited. The carpet should usually be running to the main entrance or length of the longest wall. In addition, leave 3 inches or more dimensions to trim. One time I figured out the dimension of a room it was exactly 12×14 feet- I ordered that very exact number- forgetting all about trimming and wall irregularities. I was left short one wall and I was forced to have a piece of remnant, which did not fit exactly.
Invest (or Rent) in the Right Tools.
You can not be the least bit proper installing carpet with a utility knife and hope. The tools that are specialized do count. A power stretcher and knee kicker are another requirement that cannot be compromised when it comes to having a professional looking installation. Most of the first-timers attempt to avoid the use of the power stretcher and use a knee kicker. This makes loose carpet which will wrinkle and ripple in a few months.
The majority of the tool rental shops will provide carpet installation kits at approximately 40-60 a day, which will likely include:
- Power stretcher
- Knee kicker
- Carpet trimmer (wall trimmer)
- Seaming iron (if needed)
- Stair tool
- Purchase a good utility knife, blades of carpet, a chalk line and a straight edge. They will be applied by you in future projects.
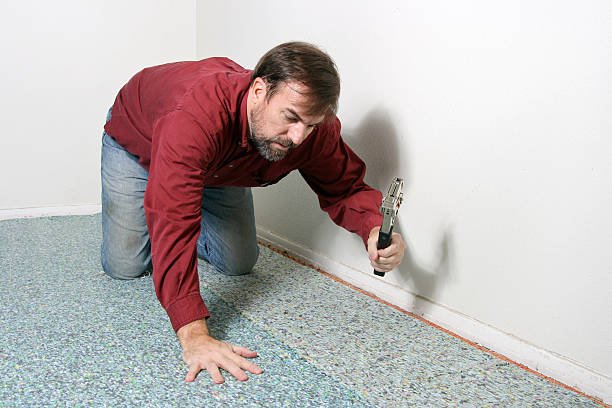
Tackle Tack Strips With Care
It is a type of thin wooden strip with angled nails, which cling to the carpet backing. These are to be mounted along the sides of the room, approximately two thirds the thickness of the carpet radius to the wall (typically 3/8 inch in the majority of residential carpets).
The nails are supposed to be pointing to the wall not out of it. I have witnessed the installation of them in the opposite direction and it is almost impossible to tuck the edge of the carpet. Also, wear gloves. I even have a little scar on my thumb of a tack strip that slipped as I nailed it. The tacks on those are curved and inexorable.
Take Your Time With Trimming
The next stage would be to cut a lot of carpet off the walls after being stretched and secured on the tack strips. Use sharp wall trimmer or utility knife and then leave approximately 1/8 inch left over which can be folded between tack strip and wall using stair tool. This produces a smooth finished edge.
Change your blade on a regular basis. When the blade used is dull, it does not cut cleanly and thus may result to fraying of the carpet backing. My blades shift in 10-15 feet of cuts.
Self-installation of carpet may save hundreds of dollars in labor expenses and it certainly is an art which can be perfected through practice. Your initial installation is likely not going to be ideal and that is all right. Concentrate on the basics, good subfloor preparation, material selection, proper stretching and the aesthetics will follow experience.
FAQs
What is the time taken to install a carpet in a single room?
On an average bedroom (12×12 feet), it should take an average of 4-6 hours when working alone and with moderate experience. The initial installation will most probably be more time consuming.
Is it possible to lay carpet on top of the current flooring?
As a rule, no. Old carpet, vinyl, and tile are supposed to be removed. It is sometimes possible to install over good hardwood but it is usually preferable to remove it.
Should I have transition strips between the rooms?
Yes, the transition strips between flooring types ensure the protection of the edges, as well as give the appearance of a complete look. They are necessary at doorways and at the junctions of carpet and tile or hardwood.
How is it possible to put furniture back on new carpet as soon as possible?
Minimum 24 hours between the carpet and the appearance of heavy furniture is necessary to ensure that the carpet has settled and the adhesives are completely dry.
How long lasts the residential carpet?
Provided with good padding and good installation, it is expected that it will last 7-10 years in busy places and 10-15 years in bedrooms, depending on the type of fiber and care.