DIY Indoor Plant Pots, I will be frank, my fascination with houseplants began approximately five years ago with one pothos cut of a friend. Jump to today my apartment is a little greenhouse and plants take up all available places where there is sunlight. The problem? Plant pots of good quality are not cheap, and it can empty your wallet quicker than you would think to purchase enough containers to house growing collection.
It is at this time that I began to make my own plant pots. It not only saved me money but it has become an outlet on its own. I have tried a bunch of ideas and made a lot of mistakes, as well as a few glamorous failures, until I discovered what to use and what not to use as DIY plant containers.
Why Waste Your Time Watched Making Your own Plant Pots?
In addition to the apparent cost savings, making your own planters will allow you to have total size, style and drainage control something that commercially acquired products do not always get nailed. I have had to have a certain size of narrow windowills, desired color to suit my decor and, needed proper drainage holes which a certain number of decorative pots strangely lack.
Something really good also lies in the fact that it is so satisfying to have a flourishing plant in a self-made container. It provides an additional dimension of reliance to the entire experience of indoor gardening.
Materials that Really Work.
Experiments have enabled me to know that some materials work better in the interior setting than other materials.
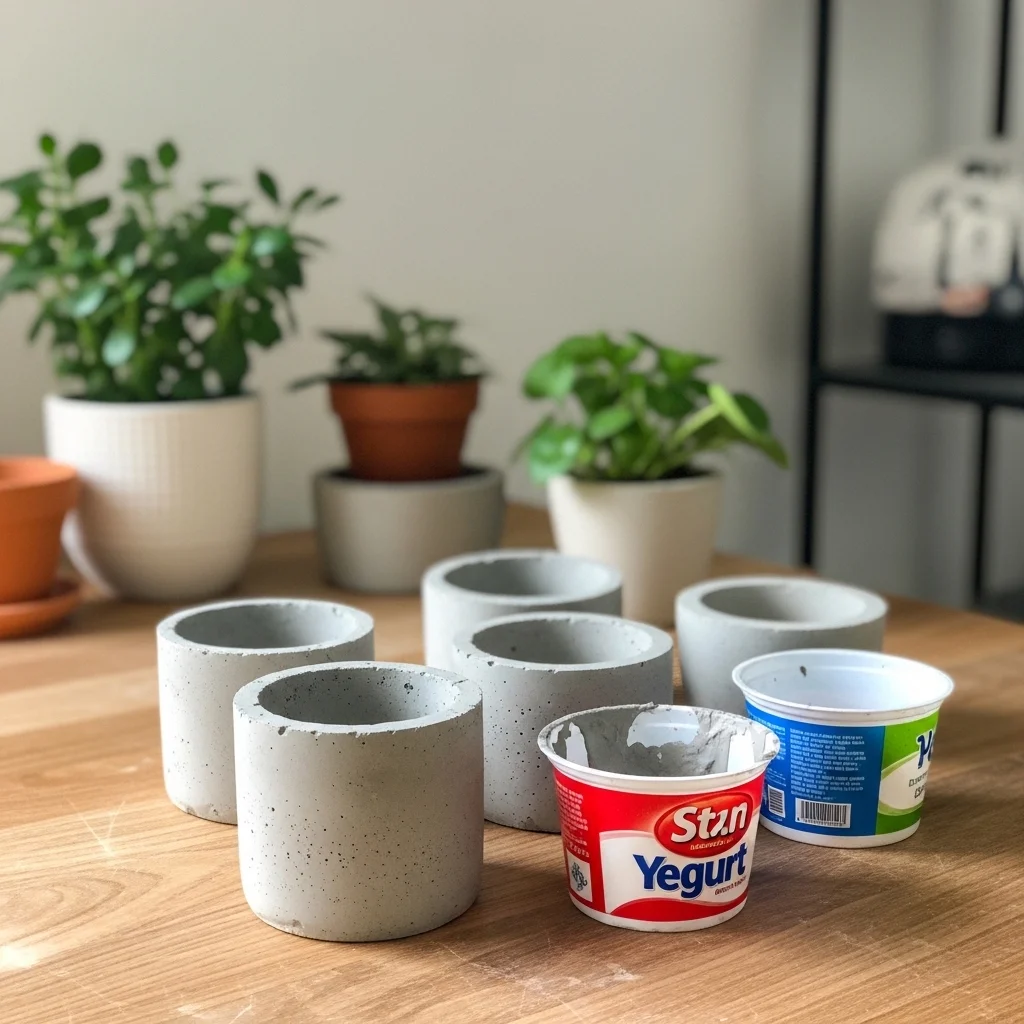
I have made concrete my favorite medium. It is sturdy, offers that current minimalist style, and surprisingly easy enough to use as a beginner. I take quick-setting concrete (which can be found at any hardware store at less than ten dollars) and pour it in molds until it is dry. Molds are used with old yogurt containers, plastic cups as well as cardboard boxes. The trick is to coat them with cooking oil beforehand- I have heard that one the first time I did this, I had to keep the first one in a Tupperware dish and it stuck there forever.
Terracotta clay is also customizable in every way provided you have time to invest. I have attended a weekend pottery lesson last year, and my skills in the throwing department are not very good, but it does not mean you need to use a wheel or a kiln to make simple pinch pots or coil pots. Smaller plants can be air-dried using clay, but it is not as water-resistant as fired clay.
The recycled containers should be mentioned here. I have been able to utilize antique teapots, old tins, crates of wood, and even books that have been hollowed out to plant succulents. The trick is to make sure that it is well drained-more later.
Hypertufa is a more or less home-made version of stone troughs alpine gardeners employ. It is an amalgamation of peat moss, perlite, and Portland cement which forms a porous lightweight substance that is ideal in plants that despise wet feet. I also made a number of hypertufa containers last spring in my cactus collection and they have stood the test of time.
The Drainage Dilemma

This is one of the things that most DIY tutorials do not cover in detail: most plants cannot do without drainage. Poor drainage is the root cause of plant deaths that I have committed. Those fashionable cement pots that have no holes? Until the root rot kills your costly fiddle leaf fig, they are beautiful.
In the case of concrete or ceramic DIY pots, I drill drainage holes before the material has completely hardened (in the case of concrete) or I use a masonry-bit on pots which are cured. It is noisy, and dirty labor, but necessary. Slow water cooling Cracking is avoided–I broke three pots before I found this out.
In the case of containers, which are not drillable such as that beautiful vintage tin, I use them as cache pots. The plant remains in a simple nursery pot having drainage, placed in the decorative pot. It is not as satisfactory as simply potting, but it works.
Projects That Have Worked to my advantage.
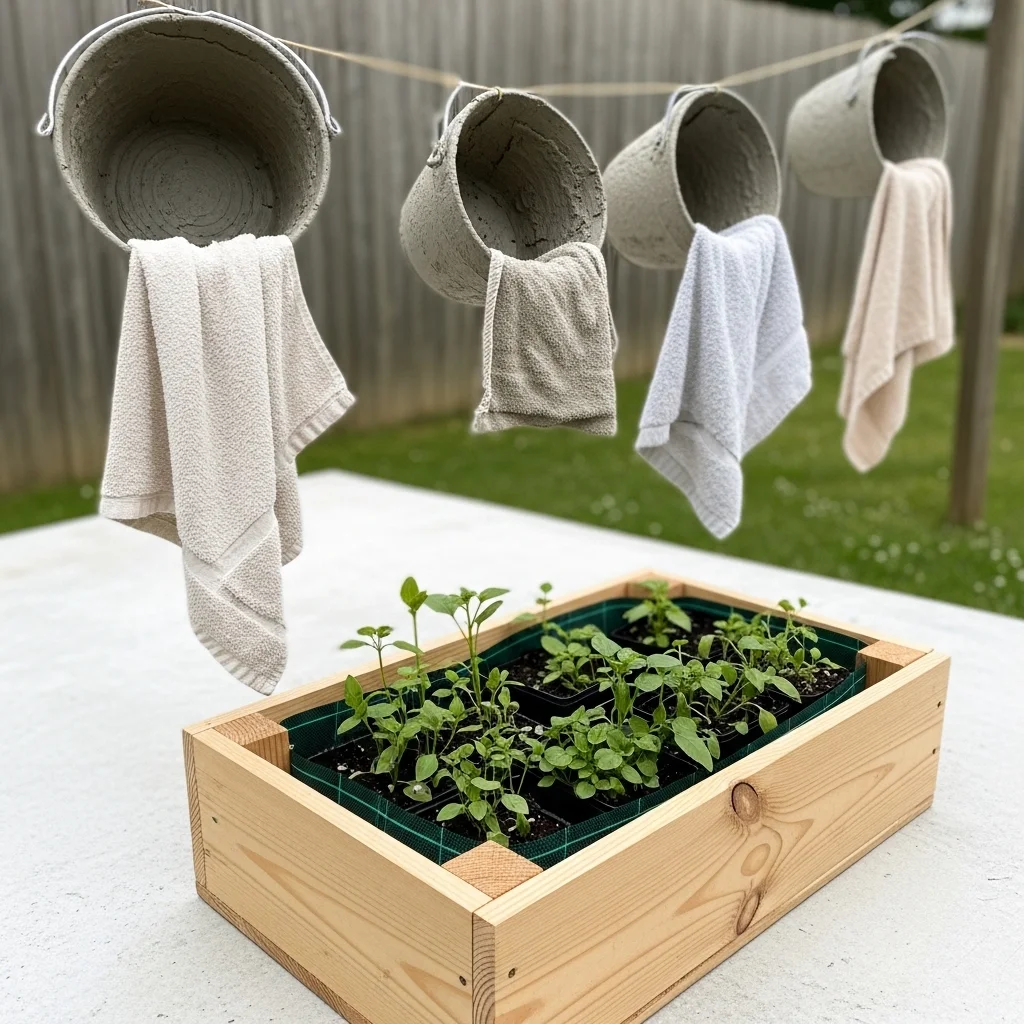
The Concrete Dip Project is most likely the least difficult place to start. I prepare concrete to a thick and pour some old towels or fabrics in it and hang them on overturned buckets or bowls and allow them to dry. The outcome resembles the costly planters with expensive textures of the boutique garden stores. The average price per pot is less than three dollars.
Wooden Box Planters are ideal in growing together a number of small plants. I purchase raw cedar fencing that has not been treated (it is not subject to rot as easily as pine), cut to size and make simple boxes using wood glue and finishing nails. Covering the internal with landscape fabric will ensure that the soil does not escape but it allows water to drain through.
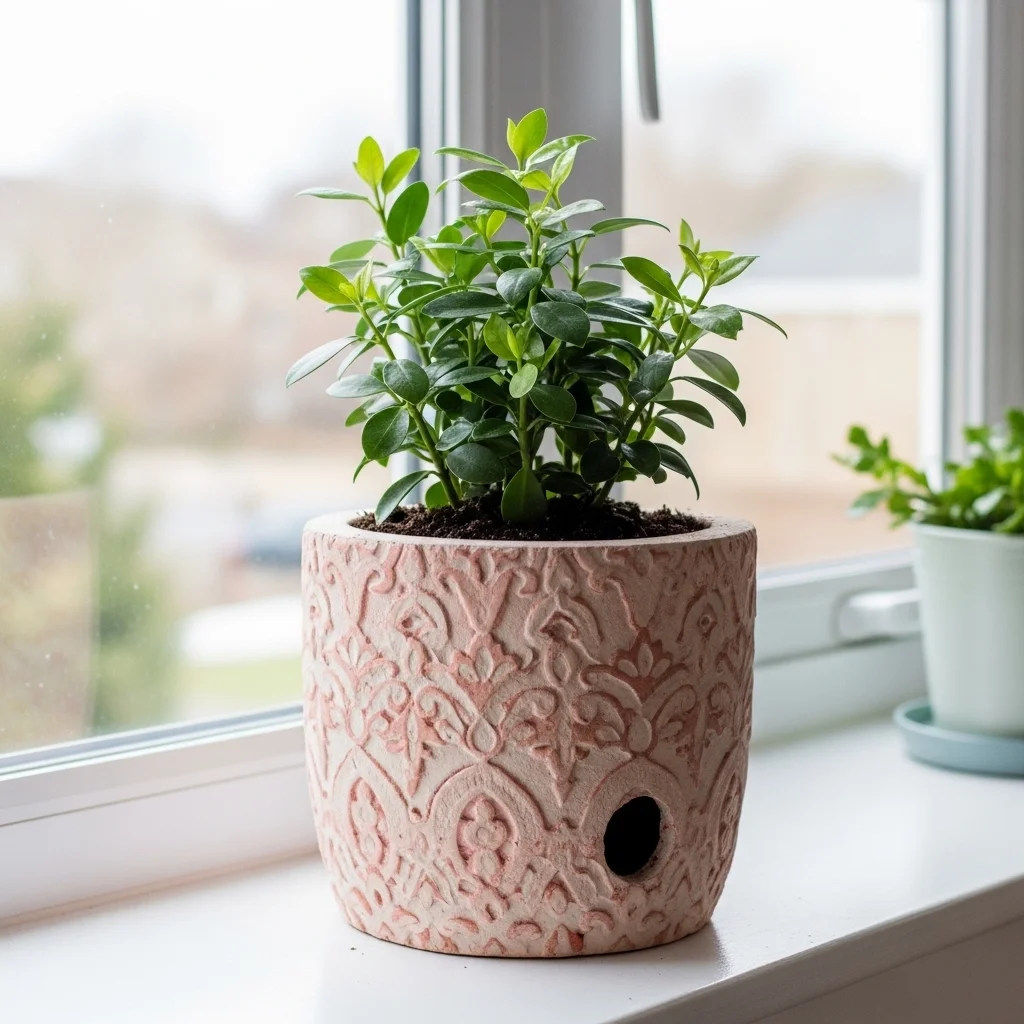
Painted Terracotta Upgrades may appear simple, however, when terracotta pots are painted using either chalk paint or outdoor acrylic paint, the vibe of the latter changes entirely. I apply matte varnish on top of them. Last summer I painted a collection of hand-painted pots, botanical illustrations, which are used to store herbs.
My Lessons Learn Not to Repeat My Mistakes.
Porous surfaces such as concrete and unglazed clay are especially important in terms of being sealed, particularly when they are placing on furniture. I discovered this when there were white mineral deposits that were left behind by concrete pots on my wooden bookshelf. Currently I seal it all with concrete sealer or polyurethane.
Big is better than you may think. My first pots were small made of concrete and soon plants grew larger than the pots. It is not easy to repot a hard concrete container. I now prepare pots moderately bigger than required or use material that can be easily broken to pieces at later stages.
Higher concrete pots have a problem with weight. The planter is a concrete box twelve inches wide and will hold approximately fifteen pounds of empty space- more like thirty pounds filled with soil and plant. Now it is basically permanent furniture.
FAQs
Are DIY plant pots required to have drain holes?
Yes, unless you are used to it and cover the bottom with rocks and charcoal. Most plants can be affected by root rot which is prevented by drainage.
What is the lowest cost material of plant pots?
Furious concrete is difficult to overlook – then a bag of quick-setting concrete costs less than 10 dollars and it produces many pots. Recycled containers are free.
Is it possible to use concrete in place of regular cement?
The cement requires aggregate (sand/gravel) to be added so that it becomes concrete. Cement is easy to crack and not appropriate in use as plant pots.
What is the process of waterproofing homemade pots?
Use concrete sealer, polyurethane or waterproof paint. Ceramics will absorb water and uncovered concrete will be vulnerable to deterioration.
What tools do I actually need?
In case of simple concrete pots: mixing container, molds, cooking spray and patience. A power drill with masonry bits is needed to do the drilling of holes.